USE CODE: FREEBAKEBOX AND GET YOUR FIRST BOX FOR FREE WHEN SIGNING UP TO A 3, 6 OR 12 MONTH PLAN. OFFER ENDS 28 FEB!
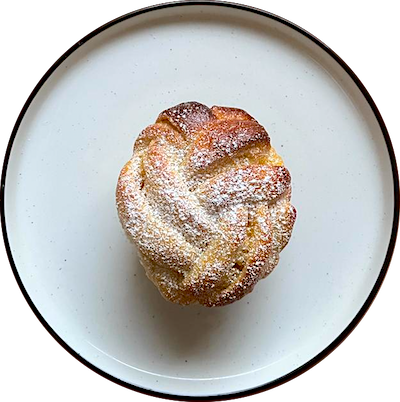
VANILLA BUNS
TOTAL TIME: 2H
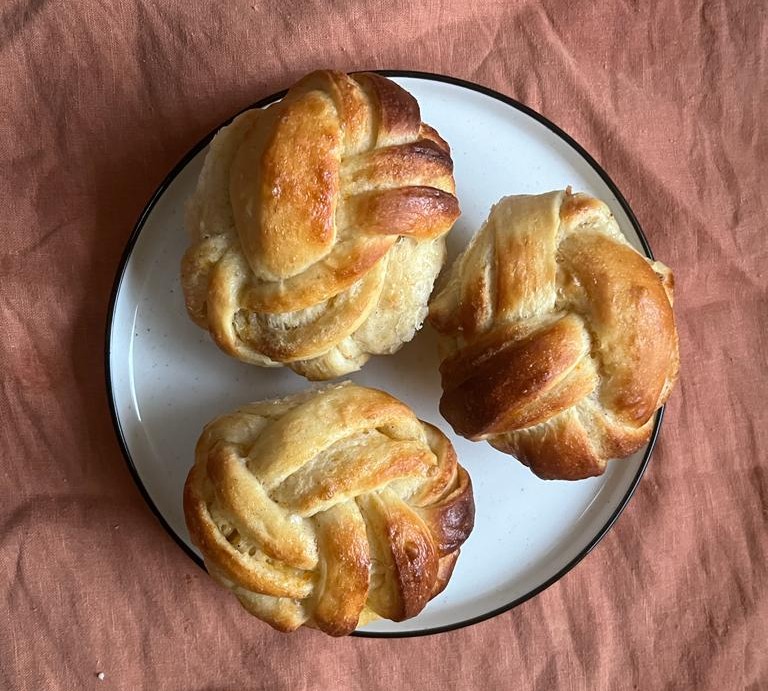
Vanilla buns, a Scandinavian delight, combine soft dough with the warm essence of ground Vanilla. These golden braids are a comforting treat, perfect for fika – Sweden's coffee break tradition. With a balance of gentle spice and sweetness, they create moments of coziness and togetherness. Enjoy the magic of cardamom buns and let their aroma transport you to Nordic kitchens.
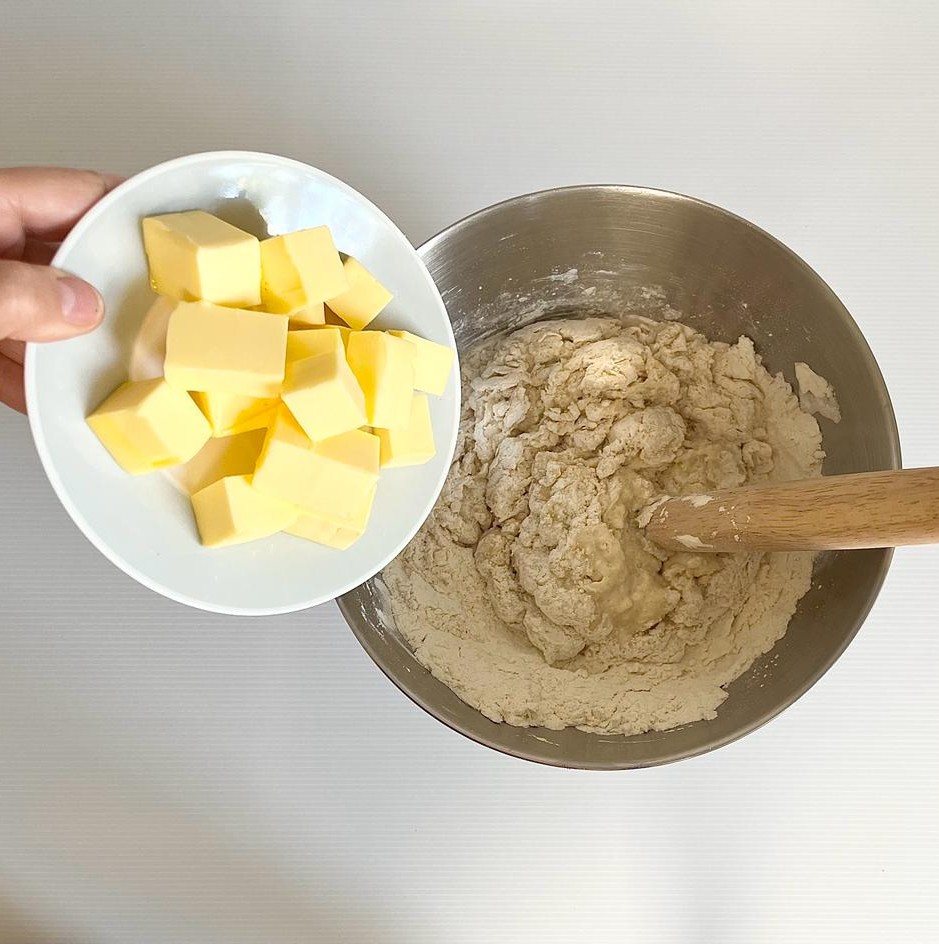
1. MIX THE INGREDIENTS
When adding the ingredients, ensure that the milk is lukewarm, but not warmer than that. You can check the temperature by placing your finger in the milk. If it feels room temperature and not hot, it is at the desired temperature. Add the butter last to get a more elastic dough.
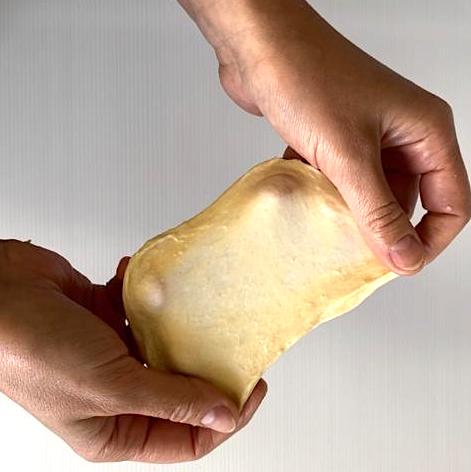
2. DO A GLUTEN TEST
Knead the dough for a good 10 min to make sure gluten threads has formed. To ensure that the dough has achieved the desired consistency and the gluten strands have developed properly, do a gluten test. Take a small portion of the dough and gently stretch it. The dough should exhibit elasticity, appearing thin and fine. You should be able to pull the dough without it breaking. If the dough does break, it indicates that further development is needed. Place the dough back in the mixer (or by hand) and work it for an additional minute to enhance gluten formation.
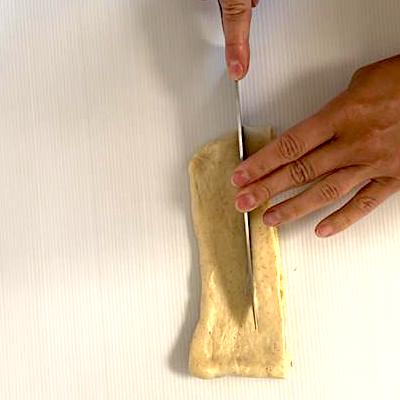
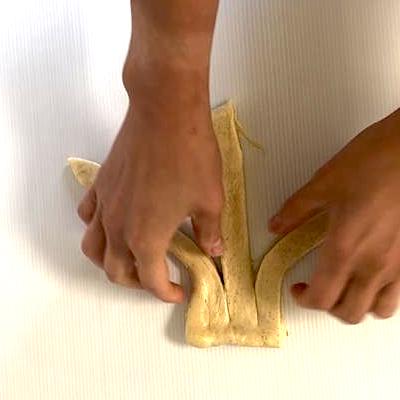
3. CUT THE DOUGH IN TO STRIPS
Roll out the dough into a large rectangle shape approximately 40cm x 50cm. Spread the filling evenly across the dough. Fold the dough in half and proceed to cut it into 20 equal pieces approximately 2 ½ cm wide, Next, cut each strip into three sections, ensuring you leave a 1 cm margin at the top edge to keep them connected.

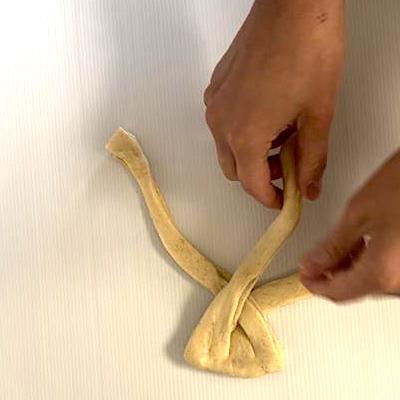
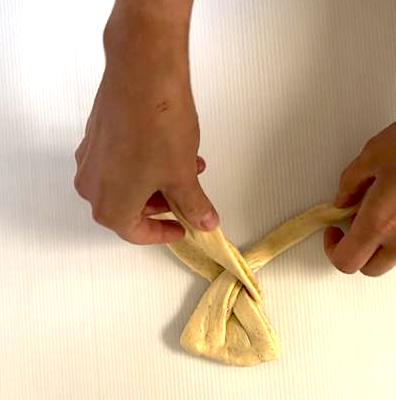
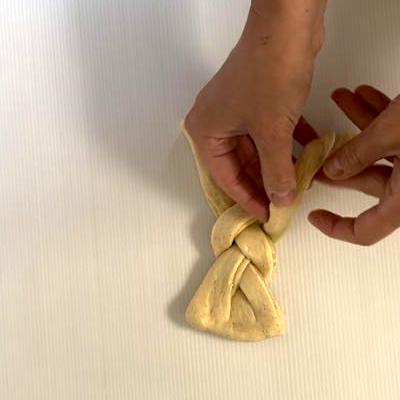
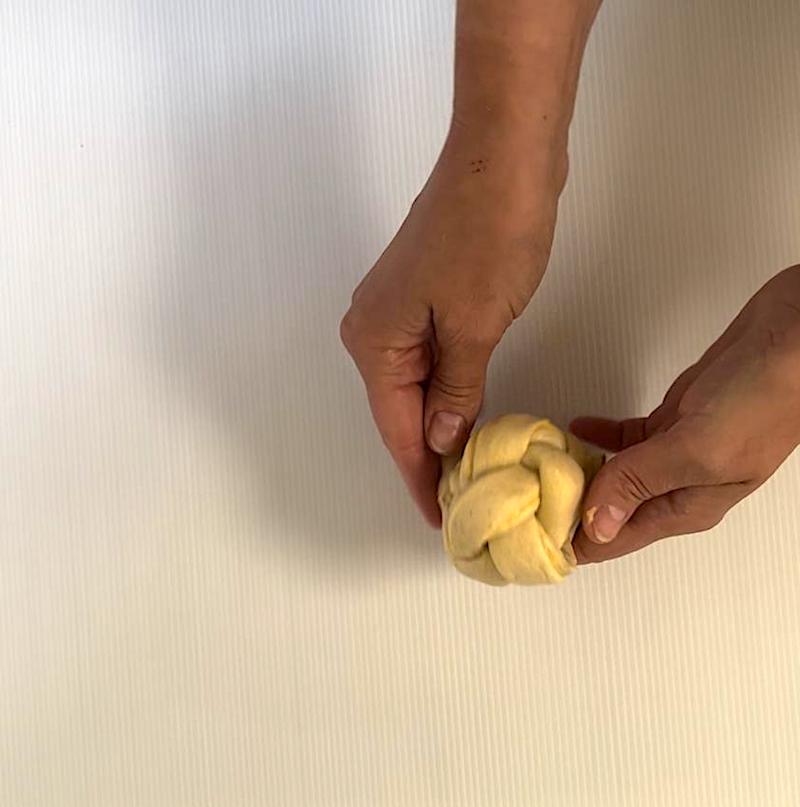
4. BRAID YOUR BUNS
Braid the strips, by ceperating the three strips and then fold the right one over the middle, move the middle slightly to the right then lift and fold the right one over the middle to the left side, and repeat until you have braided the whole strip.
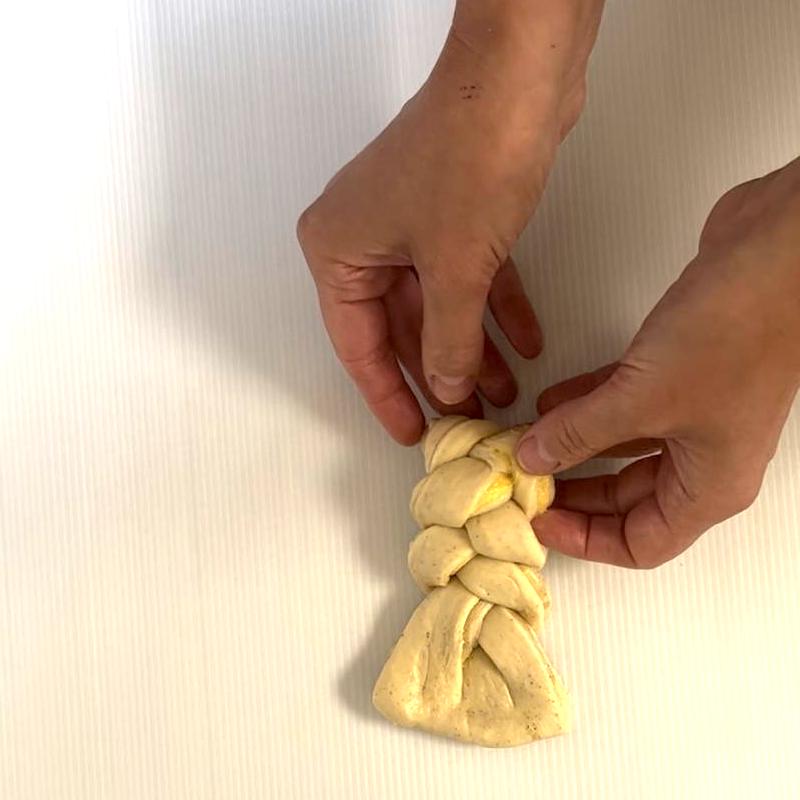
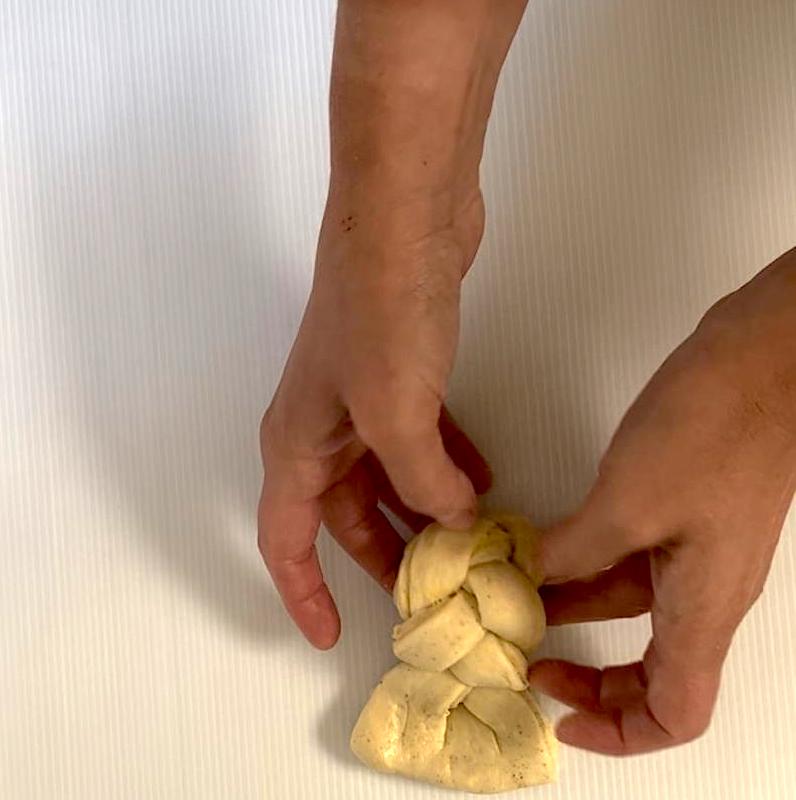
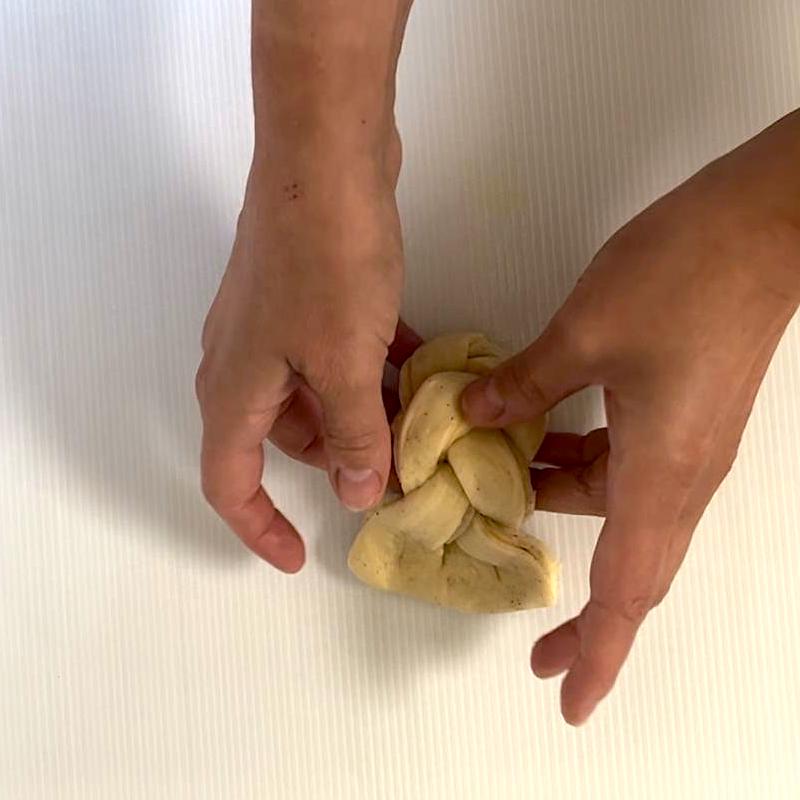

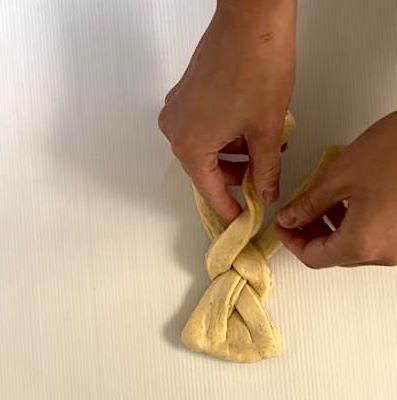
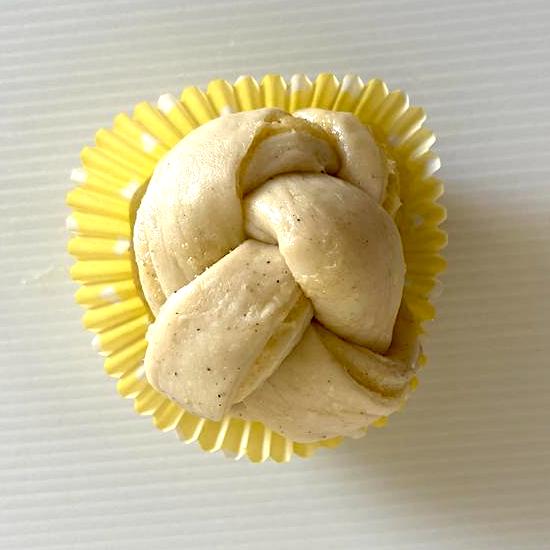
5. ROLL IT UP
Then roll them up, then position the buns in the paper cups, and place in a muffin tin or on a oven tray.
6. LET THE BUNS REST & RISE
Cover the buns with a clean tea towel and allow them to rise for 1-2 hours. The rising time may vary depending on the temperature in your kitchen. Warmer temperatures will require a shorter rise, while cooler temperatures may require a bit more time. The buns are ready when they have nearly doubled in size.
For an accelerated bun rising process, try this technique: 1. Place the buns inside a cold oven. 2. Position a small bowl containing one (1) cup of boiling water at the bottom of the oven. 3. Close the oven door to seal it shut. This method creates a warm, humid environment, which facilitates quicker and more efficient bun rising.
7. BAKE
Whisk the egg with a little water and a pinch of salt to ensure the egg dissolves smoothly, preventing any lumps on our buns. Lightly brush the buns with the egg mixture, taking care not to apply too much pressure. Place the buns in the middle of a conventional oven at 225°C or a fan-forced oven at 200°C. Bake for 8-12 minutes or until the buns turn golden in color.
Remember to monitor the buns closely to prevent them from burning!

8. GLAZE BUNS WITH SUGAR SYRUP AND DUST WITH ICING SUGAR
This step will make your buns last longer with a nice shine, The sugar syrup will help capture the moisture of the buns, keeping them nice and soft for a longer period.
When the buns comes out of the oven, brush them with the sugar syrup when the buns have cooled down, sprinkle them with tha icing sugar.